Throughout years I’ve been very lucky to learn and later teach about photography worldwide and particularly in the Galapagos islands; today, my intentions on this article is inspire you to lear endless forms of how to take pictures on the internet and then comeback so I could share specific “perks” I have learned through the years so you could comeback home with true professional pictures and memories of your vacation of a lifetime in the Galapagos.
Please feel free to read, watch and learn prior to your arrival.
I highly suggest you to be extremely aware of your camera settings, not just the basics, instead a little more than average. invest time educating yourself, good gear and practicing.
Taking pictures in the Galapagos; its landscape, wildlife and people are one of the most magical experiences you would ever find anywhere around the world.
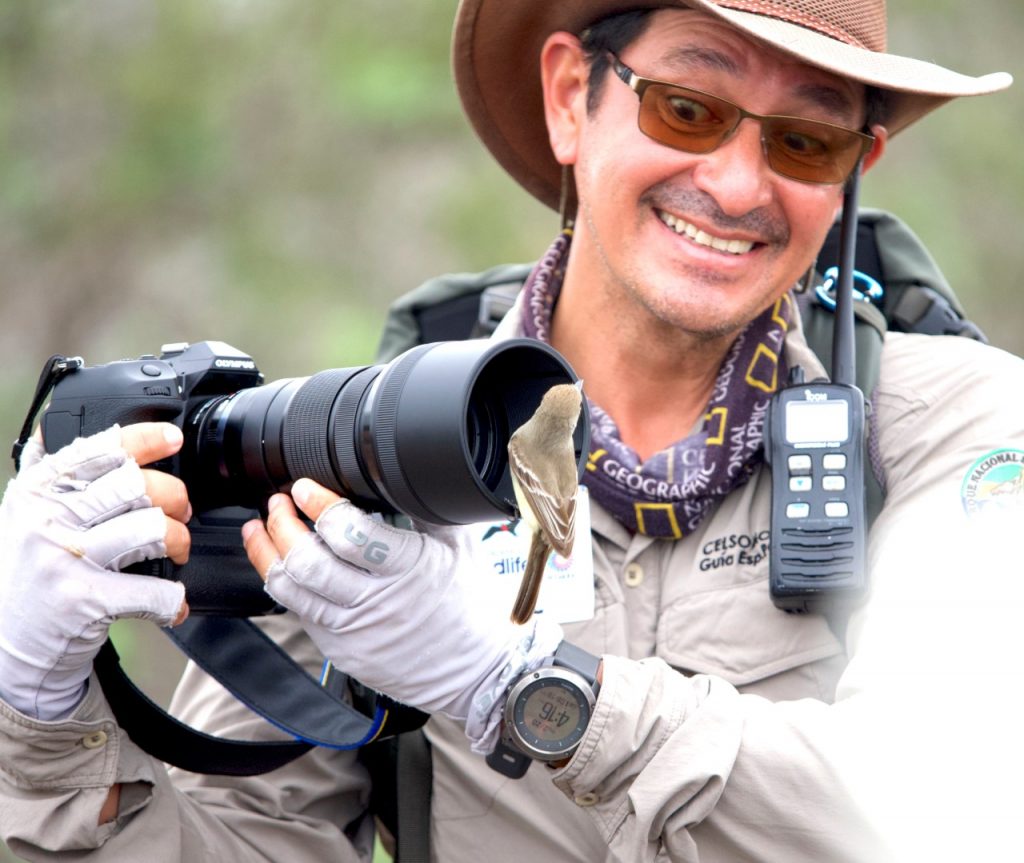
My gear suggestions: an iPhone for wide-angle-landscapes and fun pictures with all settings and finally the real deal bring any mirrorless camera (never inexpensive) SLRs and Point-and-shoots are gears of the past. An iPhone will give you speed and versatility a mirrorless will give you quality, precision and professionalism to your photography. My gear is an Olympus OM-D & E-M1X with a 40-150 mm lens together with a 1.4 teleconverter MC-14.
What we do: A nature photographer is a different breed. We have to know our gear so we can make quick changes on our settings. All according to situation and conditions that mother-nature will prepare for us; ( that’s why all cameras are ergonomic and equipped with rollers and bottoms for easy-access )
oh..! And wildlife, wildlife will never wait for you to make those changes should they take too long. So first things first. Before you even consider to set your first footstep on your walk. Make sure you take your “test-shot” meaning you have your right ISO, white balance, aperture and even exposure correctly to say the least. Once you are set, you are ready to start your expedition.
How is it done? Well; Continues-shot mode is a must for wildlife photography specially in the Galapagos. We are done taking pictures of a bird standing on the rock. What we do as professionals is rely on the naturalist knowledge and stay ready to take for what we call an “action-shots” which usually is the selection of one single dramatic picture out of the 200 you have taken from a specific activity this wildlife will preform (hopefully) for us while we wait patiently. You should be going back home with an average of 20.000 to 40.000 pictures for a 7 day trip. Yes, the work is done at home.
Be different; nowadays everyone holds a camera and locations will give you a magical opportunity to take impressive shots. The Galapagos is one of them. When you are here make sure you take pictures differently. Like an “intimate-shots”; these are all done at an eye-level from your subject. That usually means getting low on the grown, bring your knee-pad and get ready to dirt-up. For we are taking you to another level, to another point-of-view to make a big difference on your pictures. Check for a clean background, exposure and light. Move around slowly once you have secure a shot. Composition is primordial for that luxury is only given by the the island’s fearless-wildlife.
These are just a few “perks” so you could maximize your experience, please keep on reading and practicing.
Before I leave I’d like to share my moral responsibility to all living creatures in the Galapagos. To remind all our visitors; to urge you to be true to your code of conduct as a professional nature photographer. Keep a distance of the wildlife and be always respectful to what they’re doing. Do not disturb them.
Also, once in a while put your camera away so you can observe and enjoy with your all your senses this wonderful world call the Galapagos.
Good luck and welcome to the Islands,
Celso Montalvo.
GNP-Naturalist & Nat Geo Photo Instructor